The first step towards online security is setting up NordVPN correctly. Follow these simple steps to install the NordVPN app and connect to a VPN server.
Note: NordVPN supports macOS 10.15 Catalina, macOS 11 Big Sur, macOS 12 Monterey, and macOS 13 Ventura.
Attention: If you encounter issues during the installation of NordVPN on macOS Ventura, please refer to the following guide for a possible solution: macOS Ventura Error: The Installation Failed.
Table of contents:
Downloading and installing
Setting up the application
Connecting to servers
Downloading and installing
- Download NordVPN for macOS.
Alternatively, use the direct link:
https://downloads.nordcdn.com/apps/macos/generic/NordVPN-OpenVPN/latest/NordVPN.pkg
- Navigate to the folder where you downloaded the NordVPN.pkg file and double-click on it to begin the installation.
Note: Ensure the download file is saved locally on your device (e.g., downloads folder, desktop) and not within Dropbox or other file management/synchronization tools or special folders.
- A new Install window will pop up, guiding you through the installation process. Choose Continue.
- Click on Install.
- You will be asked for permission to install Installer, which is required to establish secure VPN tunnels. Enter your Mac's password and choose to install the software.
You can also confirm it with a fingerprint.
- Give access for "Installer" to files in the Downloads folder by clicking OK in the new pop-up window.
- A message will confirm that the app was successfully installed. Close the window.
Setting up and using the application
- Open your Launchpad and click on the NordVPN icon.
- If you have a NordVPN account, click Log In in the top-right corner of the screen and enter your email address and password. If you are a new user, click Sign Up at the top-right corner of the screen.
- When logging in, you will be redirected to your Nord Account. Enter your registered email address and password. You can also sign in using your Google account, or Apple ID, or by entering a code.
- If you are a new user, create a Nord Account by entering your email address and other required information.
- After completing the above steps, you will be prompted to open the NordVPN app. Agree to always allow Nord Account and grant access to the app.
- After a successful login, you will be introduced to the main NordVPN application window.
Connecting to servers
- The Quick Connect button in the top-right corner will automatically connect you to a server recommended by our smart algorithm.
- To connect to a specific server, click on the Search field in the top-left corner of the app. Enter a country, a category, or a specific server number (e.g., Canada #1224) to find what you need.
- All servers in the left sidebar are sorted by country and specialty.
To connect to a specialty server, hover over one of the categories under Specialty Servers, and click on the three-dot menu to select a Country.
- To connect to a specific country, click on it.
NordVPN features
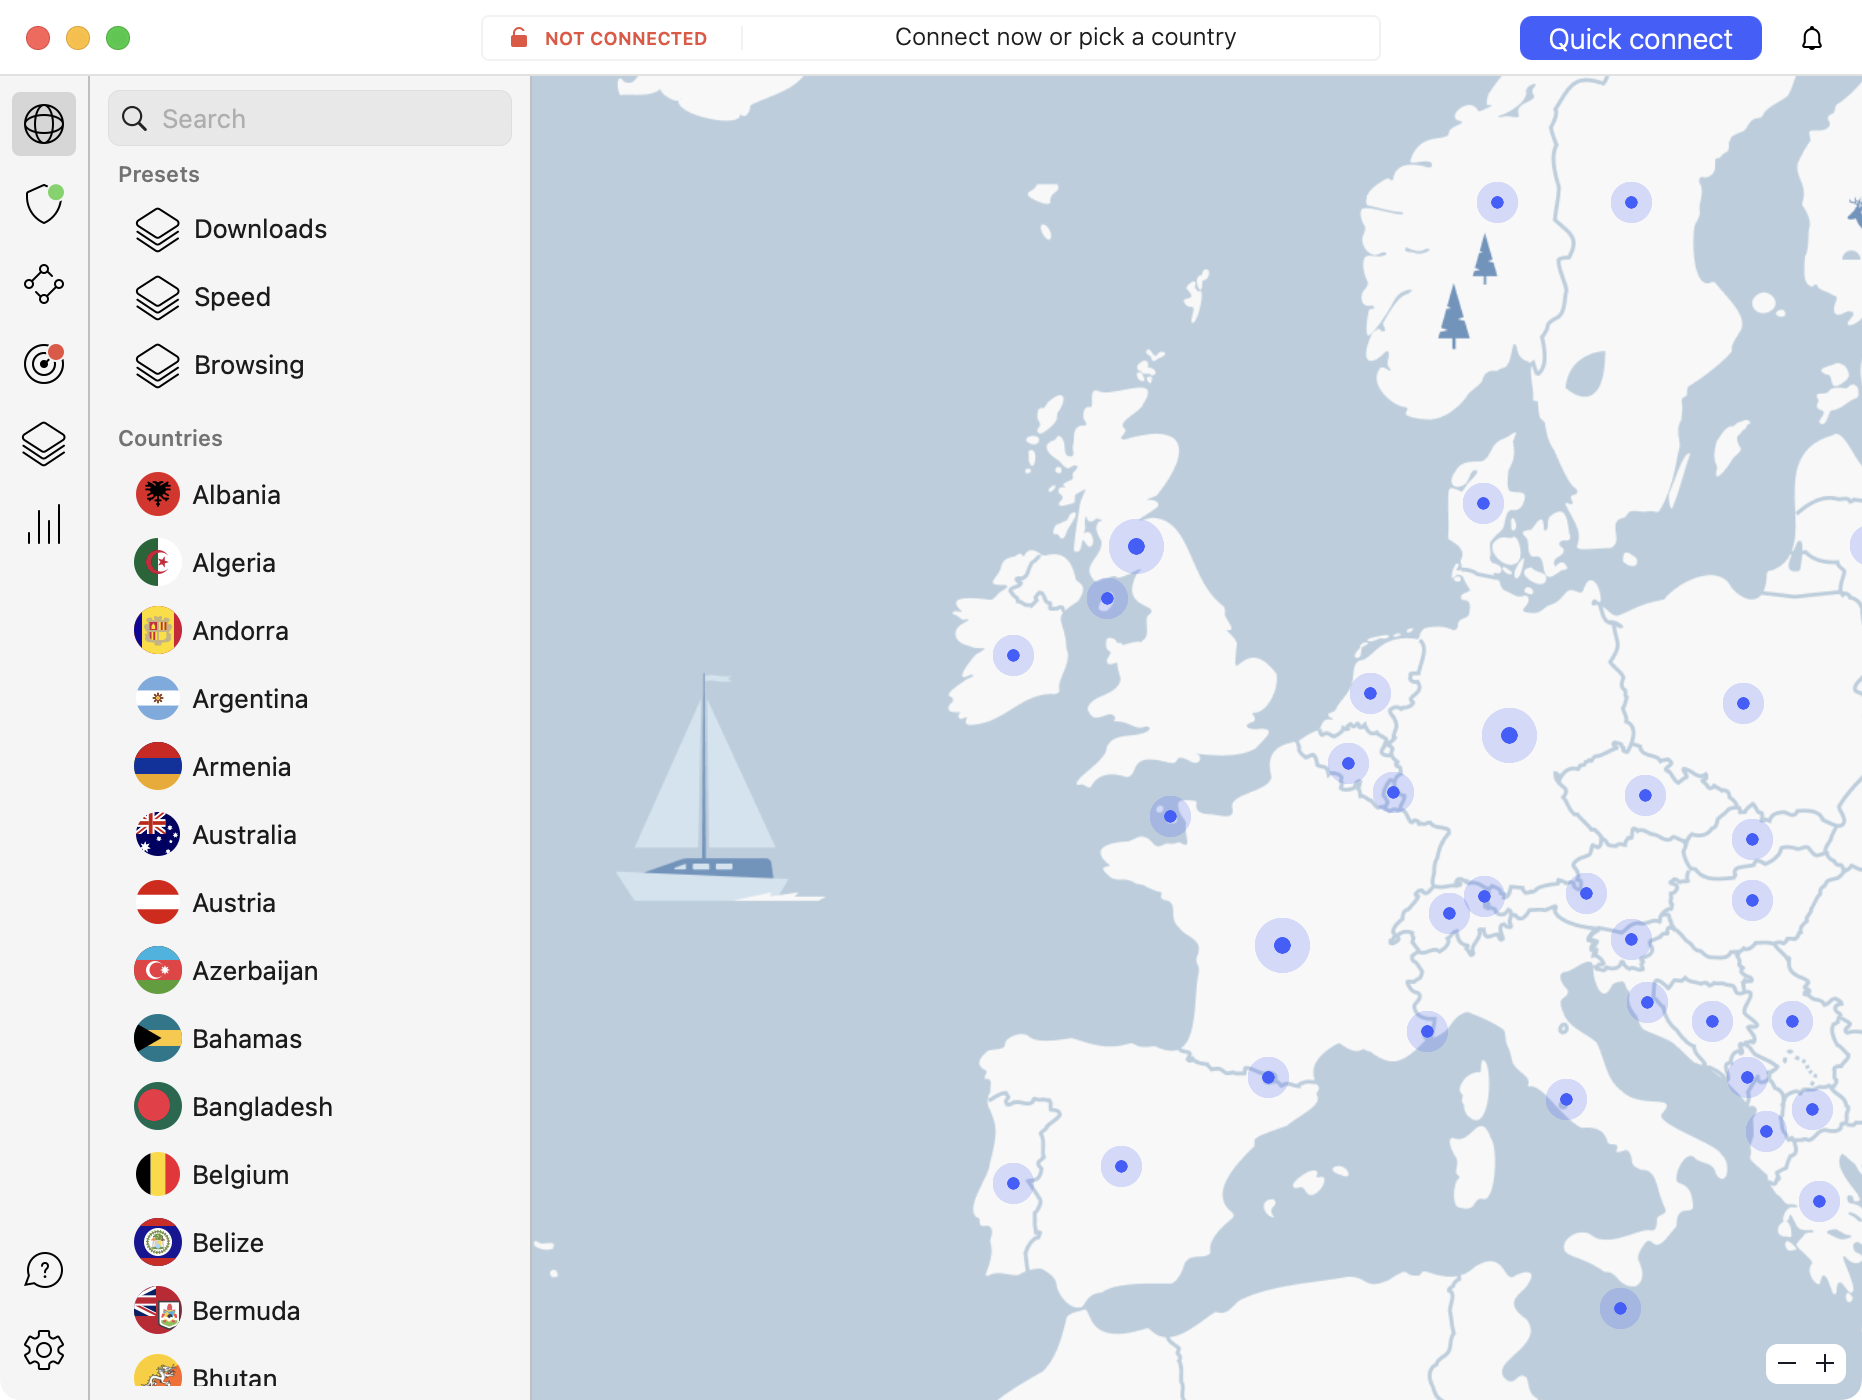
- Map tab is the app’s home, here you can find and navigate NordVPN servers in the map itself, search bar, or specialty section.
Threat Protection
- Threat Protection is a special NordVPN feature that automatically blocks ads, trackers, and malware URLs. It also deletes malware during downloads. Threat Protection works without an active VPN connection. Learn more about Threat protection.
Meshnet
- The Meshnet feature helps you to access devices over encrypted tunnels. Learn more about Meshnet.
Dark Web Monitor
- Dark Web Monitor scans the internet for any credential leaks associated with your registered NordVPN e-mail address.
Presets
Presets let you load up a specified set of configurations, including server number, type, protocol, and more at a click of a button! You’ll find many uses for this feature, like instantly loading up a streaming service or a game, along with the necessary settings to experience a smooth session.
How to set up presets?
Start at the preferences page, as depicted above. You can either edit an existing preset or create a new one by pressing Add new.
In this example, we’ll add a new one by building it from scratch. After pressing Add new, you will see a menu with the settings you can use. First, give the preset a name. Next, select from available VPN protocols. If you change the default setting Use recommended, you’ll be able to alter the server type. Here you can set a specialty server or any regular one as your type.
Depending on the server availability, you may also have the choice of selecting either a specific region.
Finally, you can add either a web page or an app to the preset. It will be displayed under the preset name on the main screen.
If you press Add link, a field will appear for the URL of the website you would like easy access to. After inserting the URL, press Enter to register it. When you set up the configuration, press Save preset, and it will be added to the main screen.
Statistics
- Statistics show you more information about your connection.
Settings
- Settings tab displays the app settings.
Quick Help
- Here you can find connection logs, be directed to our Help Center, and write an email to our customer support.
NordVPN settings
General
- Auto launch when computer starts — toggle to open the NordVPN app automatically every time you turn your device on.
- VPN Protocol — will let you choose from 3 different connection protocols (OpenVPN UDP, OpenVPN TCP, and NordLynx).
- Automatically check for updates — will check if you’re using the latest version of the NordVPN app.
- Help Us Improve — makes NordVPN better by sending us aggregated anonymous data.
Auto-connect
- When using untrusted network — toggle to automatically be connected to a network that is not added to a Trusted network list.
- Connect to — select a specific country from the list.
- The current network — shows the network you are currently connected to.
- Trusted network — you won't be automatically connected to a VPN while on a trusted Wi-Fi network.
Kill Switch
- Kill Switch prevents unprotected access to the internet when your VPN connection accidently drops.
DNS
- DNS ensures tighter security and privacy for your traffic. You can configure your device manually to use private NordVPN DNS servers.
Appearance
- Appearance settings let you add an application to your dock, menu bar, or both. Also, it lets you choose between dark and light modes.
Refer a friend
- Refer a friend tab provides you with your personal referral link and the instructions on how to refer NordVPN to your friends.
Other Apps
- Other Apps tab introduces other Nord Security products.
Account
- Account section shows your NordVPN profile and subscription information. Here you’ll also find links to NordVPN Terms of Services and Privacy Policy.